IMPORTANT!

  1. IZOFLEX slips should be glued on non-weather days, preferably at + 5 – + 25 ° C.
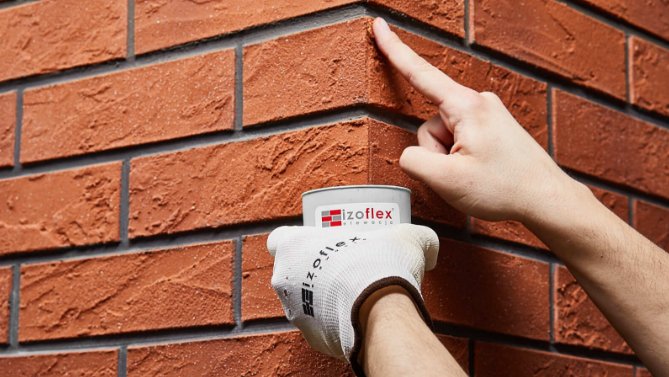
  2. Unlike the clinker, we start laying the slips from the top of the wall.
  3. Freshly plastered walls protect from rain until completely dry.
  4. Do not glue slips on frozen surface or in the presence of frosts.
  5. The adhesive drying time under optimum conditions is from 2 hours (in joints) to 5 days under slips.
  6. Do not use on horizontal surfaces.
  7. Remove any dirt caused by the adhesive before drying.
  8. No need for additional impregnation.
  9. Clean tools with water immediately after use.

Installation

Necessary tools
Traditional or laser level
Pencil
Pencil
Paintbrush
Paintbrush
Scissors
Scissors
4mm dented trowel
4mm dented trowel
Measure
Measure

Installation

Installation
From the top of the surface we measure two horizontal lines in the distance calculated with formula: 4 x width of slip used + 3 x joint 10-12 mm.

Determination of the individual levels of slip gluing can be done with the help of a masonry cord, a traditional leveler or a laser level.

Apply IZOFLEX-SK glue with 4 x 4 mm toothed trowel, preparing the surface for 4 rows of slips at the same time.

The surface area covered by the adhesive should be adjusted to the air temperature so as not to allow it to dry. The adhesive should be fresh and moist. If the adhesive dries too fast, we can use a spray to dampen the surface of the adhesive. We can also spray a surface of the adhesive in the bucket.

We start the gluing from the top of the wall, first gluing the corners. We cut the slips, we apply to each other
We start the gluing from the top of the wall, first gluing the corners. We cut the slips, we apply to each other "on contact", and the resulting gap is complemented by a special mass. Thanks to that, the work is fast and the corner looks like a real brick.

The slips are much more comfortable to cut than fold. The brick slips are made almost entirely of natural materials, not of "rubber", and these have a limited stretch. By cutting the slips we can finish one wall completely and then return to the second surface. In case of bending, we have glue immediately on both surfaces and you need to remove it from one of them before it dries and then reapply. And it takes a lot of time. When the adhesive is dry, add the adhesive to the substrate after the adhesive is dry (the material from which the slip is made). We suggest bending to the interior where the details are very important and the pace of work may be smaller.

Set slips according to the established bonding of bricks on wet adhesive, evenly pressing, with proper joints (10-12mm)

Ensure that the entire surface of the slip adheres well to the glued wall so that there is no void beneath it.

Additional bonding of the slips is superfluous, just glue in the joint smoothed with a moist (but not wet) brush (10 mm)

Remember that the smoothed adhesive tightly covers the edges of the slips so that no water gets in.

When the adhesive is dry, the crevices formed at the corners of the gap are complemented by a special, dedicated mass (the same material is made of slips).

IZOFLEX slips are cut to size with scissors or cut from the bottom with a knife and broken.

Finished!
Finished!

MONTAŻ IZOFLEX LAMELL

https://www.youtube.com/watch?v=QGjhC1gGkUc

Use Izoflex in your project!

Use Izoflex in your project!

Ręka
Inesta sp. z o.o. © 2025
design: DST DESIGN